This is how the wall looks at the moment:

I am happy with the detail added to the foreground, however the right hand side and centre box I am not happy with. I just think it doesn't feel right and therefore it doesn't work.
After discussing this with my tutor, I decided to just rip down the cutouts I don't like (which is the whole of the right side and the centre box.
I have now decided to just have a foreground with fine detail work like the tree and grass shown in the photograph above and have a middle ground which will be detailed but just using charcoal to symbolise its distance from the foreground. And the background will in fact be the wall itself.
This is now my complete Spring Wall:

I have painted the centre box in grey. As you can see that I have light and dark areas, this is created by using black and white paint but not to mix then. I just dripped the paint brush in white and then black paint and just started making strokes to get this effect. I thought this world look better than having just one shade of grey.
Along the bottom I had added detailed cutouts of daffodils and tulips to symbolise that is wall is spring, because previously it just looked like a landscape.
Although, I spend a lot of time making the cutouts for this wall, and then ripping them off and re-doing then, this Spring wall now complete looks simple but great and I am happier with the way the wall looks now.
This is what the Summer wall looks like at the moment:

This is what the Summer wall looks like after the further development:

As you can see that I have taken out the river and also the waterfall, instead I have placed a middle ground and also continued the grass from the spring wall.
I have also added detailed sunflowers along the bottom of the wall.

This is the detailed line drawing of the sunflowers.

This is how the detailed drawings looks when pasted onto the walls.
This is how the Autumn wall looks like at the moment:

I like the look of the left hand side of this wall. There will only be changing the right hand side.
This is what the Autumn Wall looks like after the further development:

Rather than adding detailed drawings, I added dried autumn leaves, which I had collected last Autumn and pasted them on the wall and along the bottom of the wall. I then spray painted them white. I have drawn onto the wall to add detail of the cutouts already pasted. The hill on the left hand side is continued from the summer wall.
Here is a close up of the leaves:

This is the Winter Wall at the moment:
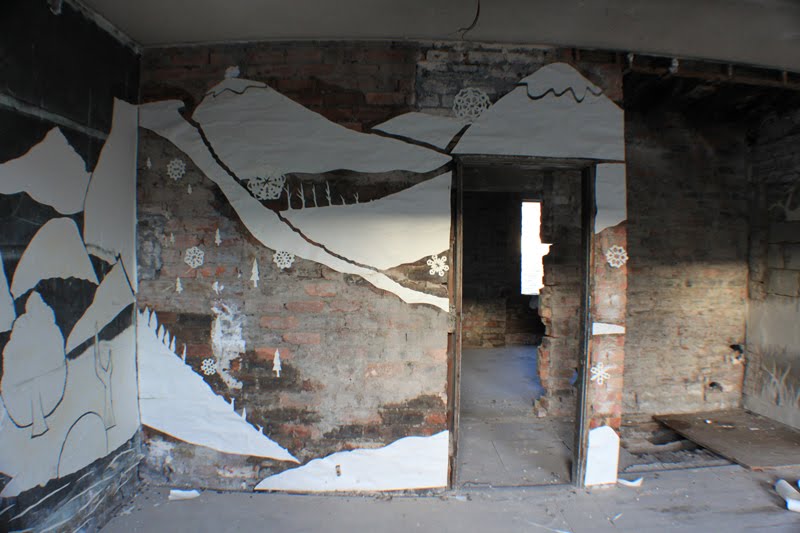
I am happy with this wall, therefore will not change it. I will add cutouts of snowflakes and layer them along the bottom of the wall rather than adding detail. The cutouts themselves will be quite detailed.
This is the complete winter wall:

The back wall on the right hand side was also supposed to be part of the winter wall, however due to health and safety risk factors I chose not to use the back wall.
I am happy with the wallpaper cutouts of all the walls. Spring and Winter walls are both complete, however for Summer and Autumn, I need to add fine detail onto the large tree. I left this till I have time as it is very time-consuming.


